
A camera gear checklist for a Komodo liveaboard trip covers three separate kits: topside (telephoto zoom for dragons and birds, wide lens for landscapes), underwater (a housing with wide-angle and macro options), and power logistics (spare batteries, dry bags, surge-safe charging). Pack redundancy — there is no camera shop between islands.
Why Packing for Komodo Is Harder Than a Standard Dive Trip
Most dive-trip packing lists assume one environment: underwater. A komodo island liveaboard itinerary asks your gear to do three jobs in the same week — trek dry, dusty ranger trails on Komodo and Rinca where a dragon might appear 20 meters away, hold steady on a rolling boat deck for landscape shots of Padar’s ridgeline, and then survive daily submersion in saltwater for reef and pelagic photography. Each of those environments punishes different gear in different ways, and there’s no electronics store or dive shop between islands once you’ve left Labuan Bajo.
That combination is exactly why a generic “dive trip packing list” undersells what photographers actually need here. This checklist assumes you’re bringing a mirrorless or DSLR body plus a housing, but the packing logic holds even if you’re shooting phone-only with a compact action camera — the power, protection, and redundancy problems are the same regardless of what’s inside your bag.
The Complete Camera Gear Checklist (Topside + Underwater)
Use this table as your baseline, then adjust for the specific itinerary — a macro-heavy south-loop trip needs a different lens priority than a north-loop trip built around Manta Alley pelagics or dragon trekking days.
| Category | Item | Priority |
|---|---|---|
| Camera bodies | Primary body + backup (phone counts as a backup in a pinch) | Essential |
| Topside lenses | Telephoto zoom (100–400mm equiv.) for dragons/birds, wide zoom for landscapes | Essential |
| Underwater housing | Rated housing matched to your body, tested for leaks before the trip | Essential |
| Underwater lenses | Wide-angle/fisheye port + macro port (wet-mountable if traveling light) | Essential |
| Strobes/lighting | At least one strobe or video light, spare O-rings for the strobe arm | Essential |
| Batteries | 3–4 spares per body, all charged before boarding | Essential |
| Memory cards | Multiple smaller cards over one large card, plus a card wallet | Essential |
| Power | Universal adapter, multi-socket splitter, portable power bank | Essential |
| Drybag/dry box | Roll-top drybag for tender transfers, silica gel packets for housing storage | Essential |
| Cleaning kit | Housing O-ring grease, microfiber cloths, blower/rocket bulb, lens cloths | Recommended |
| Rain sleeve/cover | For topside gear during tender rides and sudden squalls | Recommended |
| Drone (optional) | Sub-250g model preferred, spare batteries, propeller guards | Optional, confirm at booking |
| Documentation | Camera insurance policy, receipts for customs, model/serial list | Recommended |
Power & Charging Onboard: What to Expect
Liveaboards in Komodo run on generator power, typically supplying standard 220V outlets in the saloon, dining area, or cabins depending on the boat’s build — but the number of outlets is almost always smaller than the number of devices your camera bag needs charged. A shared charging station is common on most vessels, usually a power strip near the saloon or charging cabinet rather than an outlet in every cabin, which means photographers who bring their own multi-socket splitter and a universal plug adapter avoid the nightly queue for a free socket.
Generator power can also cycle off overnight on some boats to save fuel, so don’t assume an all-night charge is guaranteed — top off batteries during dinner or the evening briefing rather than leaving devices plugged in and walking away. A portable power bank is the single most useful backup here: it lets you top up a drained battery between dives without competing for a saloon outlet, and it still works if the generator cycles down. Confirm your specific boat’s outlet count and charging setup with your operator before you pack a six-way power strip you won’t need — vessel electrical layouts vary across the komodo liveaboard fleet.
Waterproof Housing: Bring Your Own or Rent Locally?
Bring your own housing if photography is the primary reason for your trip. Rental housings in Labuan Bajo exist, but availability is inconsistent, sizing rarely matches every camera model, and a rental unit you haven’t pressure-tested yourself is a real risk on a multi-day trip where a flood means the rest of your underwater shots are gone. If your camera body and housing are a matched pair you already trust, that pairing is worth the extra checked-baggage weight.
If you don’t own a housing and still want underwater shots, tell your operator during booking rather than assuming a rental will be available on arrival — some boats keep a compact housing or GoPro-style rig for guest use, but this varies by vessel and is never guaranteed stock. A safer middle ground for casual shooters: a rugged waterproof action camera in a factory housing, which is far more replaceable and far more travel-durable than a rented DSLR housing of unknown maintenance history. Whatever you bring, do a pool or shallow-water leak test in the first minutes of the first dive — not on day three when a flood means the trip’s photography is over.
Ready to sail? The 3D2N Komodo Liveaboard share-cabin open trip is bookable directly through Komodo Luxury Open Trip — live schedules and cabin availability. WhatsApp +62 811 3823 875 or email [email protected].
Drones on a Komodo Liveaboard: What to Know Before You Pack One
Drones are generally workable on a Komodo trip, but flying inside the national park is not a spontaneous, pack-and-go decision — treat it as something you request through your operator before you sail, not something you assume you’re free to fly the moment you spot a good angle. Recreational drones are tolerated at a handful of viewpoints, restricted near ranger stations and active dragon territory, and always subject to on-the-spot ranger discretion that can vary by day and by season — confirm current rules and any required permission with your operator at booking rather than relying on what a previous traveler reported.
Practically, that means: tell your operator you’re bringing a drone when you book, provide the model and weight (sub-250g models generally face less scrutiny), charge and pack spare batteries before boarding since there’s no charging infrastructure at ranger stations, and be ready to land immediately if a ranger asks. Flying from the boat deck over open water, away from shore, is generally the most workable option and doesn’t require the same site-specific approval as flights over Padar or near dragon territory. For the full rules picture, our FAQ hub covers park-wide drone and permit questions in more depth.
Best Lens for Wildlife Shots — Topside and Underwater
Komodo’s wildlife splits cleanly into two lens problems, and packing only one solution is the most common gear mistake photographers make here. Topside, a telephoto zoom in the 100–400mm equivalent range is the workhorse — dragons at Padar Island and Rinca are viewed from a ranger-mandated safe distance, and a longer lens is what turns a distant, cautious sighting into a frame-filling shot without breaking trekking protocol. The same lens covers frigatebirds, sea eagles, and other savanna wildlife spotted from the trail or the boat deck.
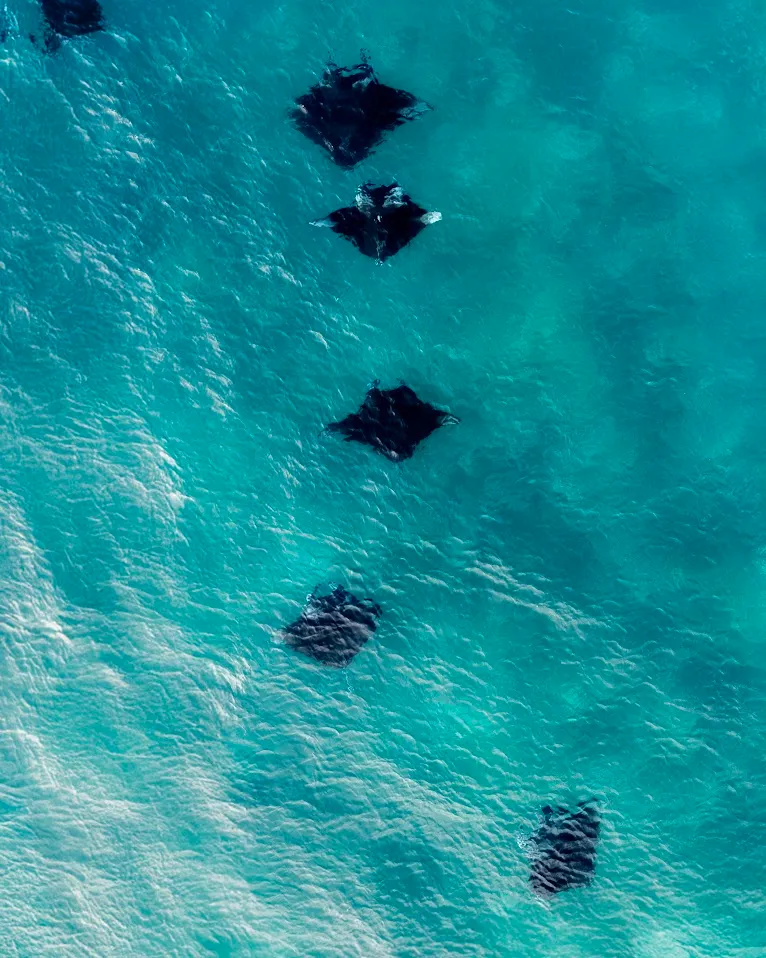
Underwater, the split is wide-angle versus macro, and the honest answer is you need both, on different days. Big-animal encounters — reef sharks cruising Castle Rock, mantas gliding past cleaning stations at Manta Alley — reward a fisheye or wide zoom that lets you get physically close and still frame the whole animal, since water clarity drops sharply the further you shoot from a distance. Macro-heavy south-loop sites reward the opposite: a 60mm or 100mm macro lens for frogfish, pygmy seahorses, and nudibranchs tucked into soft coral, where a wide lens simply can’t resolve a subject that small. If your itinerary mixes both loops, a wet-mountable macro lens you can swap on a wide-angle port underwater is lighter to travel with than two full dedicated setups.
A Practical Packing Timeline: From Booking to Boarding
- At booking — confirm gear logistics with your operator. Mention any drone, ask about onboard charging capacity, and flag if you’re relying on a rental housing.
- 2–3 weeks before departure — service your housing. Pressure-test O-rings, replace anything showing wear, and confirm your housing still fits your current camera body if you’ve upgraded recently.
- 1 week before — charge and label everything. Full-charge every battery, label spares by camera so you’re not guessing mid-trip, and format memory cards fresh rather than trusting old data is backed up.
- Packing day — split gear across carry-on and checked luggage. Camera bodies, lenses, and spare lithium batteries travel in carry-on per airline rules; bulkier housings and accessories can go checked if padded well.
- Arrival in Labuan Bajo — do a gear inventory before boarding. Confirm nothing was damaged in transit and that your housing seals are still seated correctly before the first splash.
- Day one aboard — leak-test in shallow water first. Never trust a housing’s first dive of the trip to a deep or current-heavy site.
- Every evening — rinse, dry, and recharge. Use the dedicated camera rinse tank (never the general gear tank), dry housings fully before storing, and top off batteries during the evening downtime rather than overnight.
Care & Maintenance Gear Photographers Forget
The items that get left off most packing lists aren’t the exciting ones. Silica gel packets inside your dry box fight the humidity that fogs lenses and corrodes contacts on a multi-day trip. A small tube of O-ring grease and a spare O-ring set for your housing and strobe arms means a worn seal doesn’t end your trip early. A rain sleeve or simple dry bag protects topside gear during tender transfers between the yacht and shore landings, which is when cameras are most exposed to spray and unexpected rain. And a card wallet — not a single high-capacity card — means one corrupted card doesn’t wipe out a full week’s shooting.
None of this replaces good judgment on the water: check current strength with your dive guide before deciding which lens goes on for the day, and treat every housing seal check as non-negotiable, every dive, not just the first one. Browse our dive sites guide for a fuller picture of which spots favor which gear before you finalize your kit.
Frequently Asked Questions
What gear should I bring?
Bring three kits: topside (telephoto zoom for dragons and birds, wide lens for landscapes), underwater (a tested housing with wide-angle and macro lens options), and power logistics (3–4 charged spare batteries, multiple memory cards, a universal adapter, and a portable power bank). Add a dry box with silica gel, spare O-rings, and a rain sleeve for tender transfers — there’s no camera shop between islands, so redundancy matters more than on a typical trip.
Is there a charging station onboard?
Most boats offer a shared charging station — usually a power strip in the saloon or a charging cabinet rather than an outlet in every cabin — running on generator power that can cycle off overnight on some vessels. Bring your own multi-socket splitter and a universal plug adapter to avoid competing for a free outlet, and top off batteries during dinner or the evening briefing rather than assuming an all-night charge.
Waterproof housing rental?
Bring your own housing if photography is a priority — rental housings exist in Labuan Bajo but availability and sizing are inconsistent, and a rental you haven’t pressure-tested yourself is a real risk on a multi-day trip. If you don’t own one, tell your operator at booking rather than assuming a rental will be available on arrival, since only some boats keep a compact housing or GoPro-style rig for guest use.
Drone allowed onboard?
Generally yes to bring one, but flying inside the national park requires advance coordination through your operator, not a spontaneous decision on deck. Recreational drones are tolerated at a handful of viewpoints and restricted near ranger stations and dragon territory, subject to on-the-spot ranger discretion — confirm your drone’s model, weight, and intended shots with your operator at booking, and check current park regulations before you fly.
Best lens for wildlife shots?
Topside, a 100–400mm equivalent telephoto covers dragons, birds, and distant savanna wildlife viewed from a ranger-mandated safe distance. Underwater, pack both a wide-angle or fisheye for big-animal encounters like reef sharks and mantas, and a 60mm–100mm macro lens for small critters at south-loop sites — a wet-mountable macro lens on a wide-angle port is the lightest way to cover both without two full setups.
Ready to put this checklist to work? The 3D2N Komodo Liveaboard share-cabin open trip is bookable directly through Komodo Luxury Open Trip — live schedules and cabin availability. If you want an itinerary built specifically around photography days, our photography-focused liveaboard itinerary and the 3D2N itinerary are both good starting points. WhatsApp +62 811 3823 875 or email [email protected] — and check current park regulations for drones and gear at booking, since rules can change between seasons.